to break its hammer, side liner, counter liner, screen (screen plate) and other zero-distance contact with the ore, wear is inevitable, but we can replace these wear parts on time, effectively avoid the damage of the crushing material to other parts of the crushing station in the crushing process, thereby extending the overall service life of the crushing station (machine).
brings to you today is the relevant content and replacement process of counterattacking and breaking vulnerable wear parts (wearing parts).
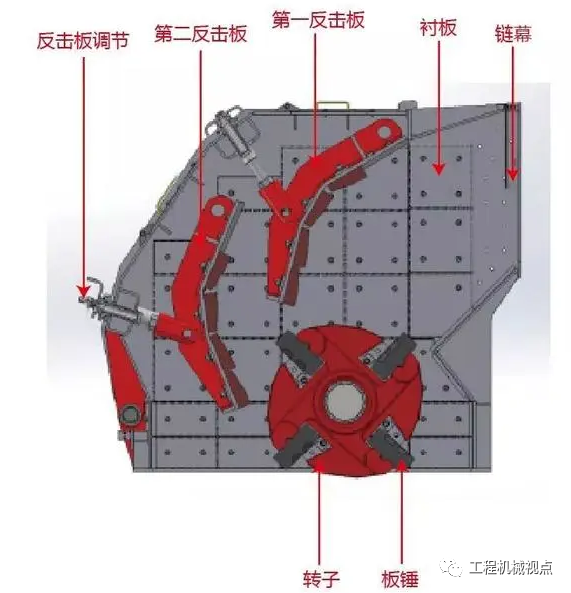
plate hammer is the key and vulnerable part of the impact crusher, its service life is closely related to the production capacity of the crushing station (machine), so the plate hammer should be replaced reasonably.
Plate Hammer on Rotor
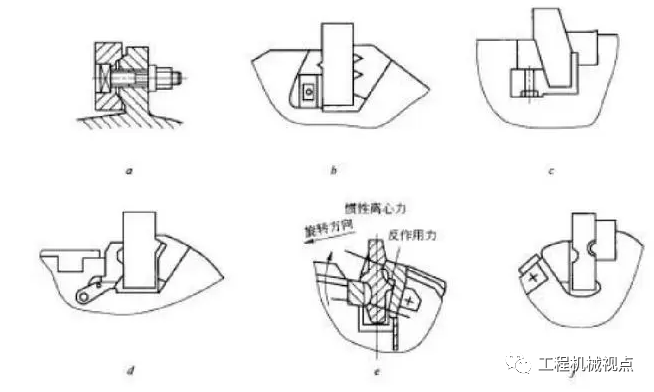
A bolt fastening method:plate hammer is fastened to the plate hammer seat of the rotor by means of bolts. The plate hammer seat has a tenon [s ǐ n] shape, which can use the tenon to bear the impact force of the plate hammer during work, avoid the bolt being cut, and improve the reliability of bolt connection;
B wedge fastening method:use wedges to insert them into the corresponding slot holes between the plate hammer and the rotor to tighten them. According to the direction and position of the wedge force, such fastening methods can be summarized into three forms. The wedge fastening method is more reliable and convenient for loading and unloading. As the relative series movement between the plate hammer and the rotor is eliminated, the wear of the rotor is reduced. But using bolts to tighten the wedge, the thread is easy to deform, damage, or even break. When the thread is deformed, it also causes great difficulties for the disassembly and assembly of the plate hammer. In order to overcome this disadvantage, hydraulic wedge fastening method can be adopted. It uses the plunger in the oil cylinder to remove the support and wedge, and then lift the plate hammer to replace or change direction of the plate hammer. This fastening method is safe and reliable, easy to replace and convenient to maintain;
C embedded fastening method:plate hammer is inserted into the groove of the rotor from the side. In order to prevent axial movement, both ends are pressed with pressure plates. As the fastening bolts are removed, the reliability of the plate hammer is improved. Using the centrifugal force generated when the plate hammer rotates and the reaction force when the impact is broken, the rotor is easily worn into a replaceable structure, so it is convenient to load and unload and easy to make.
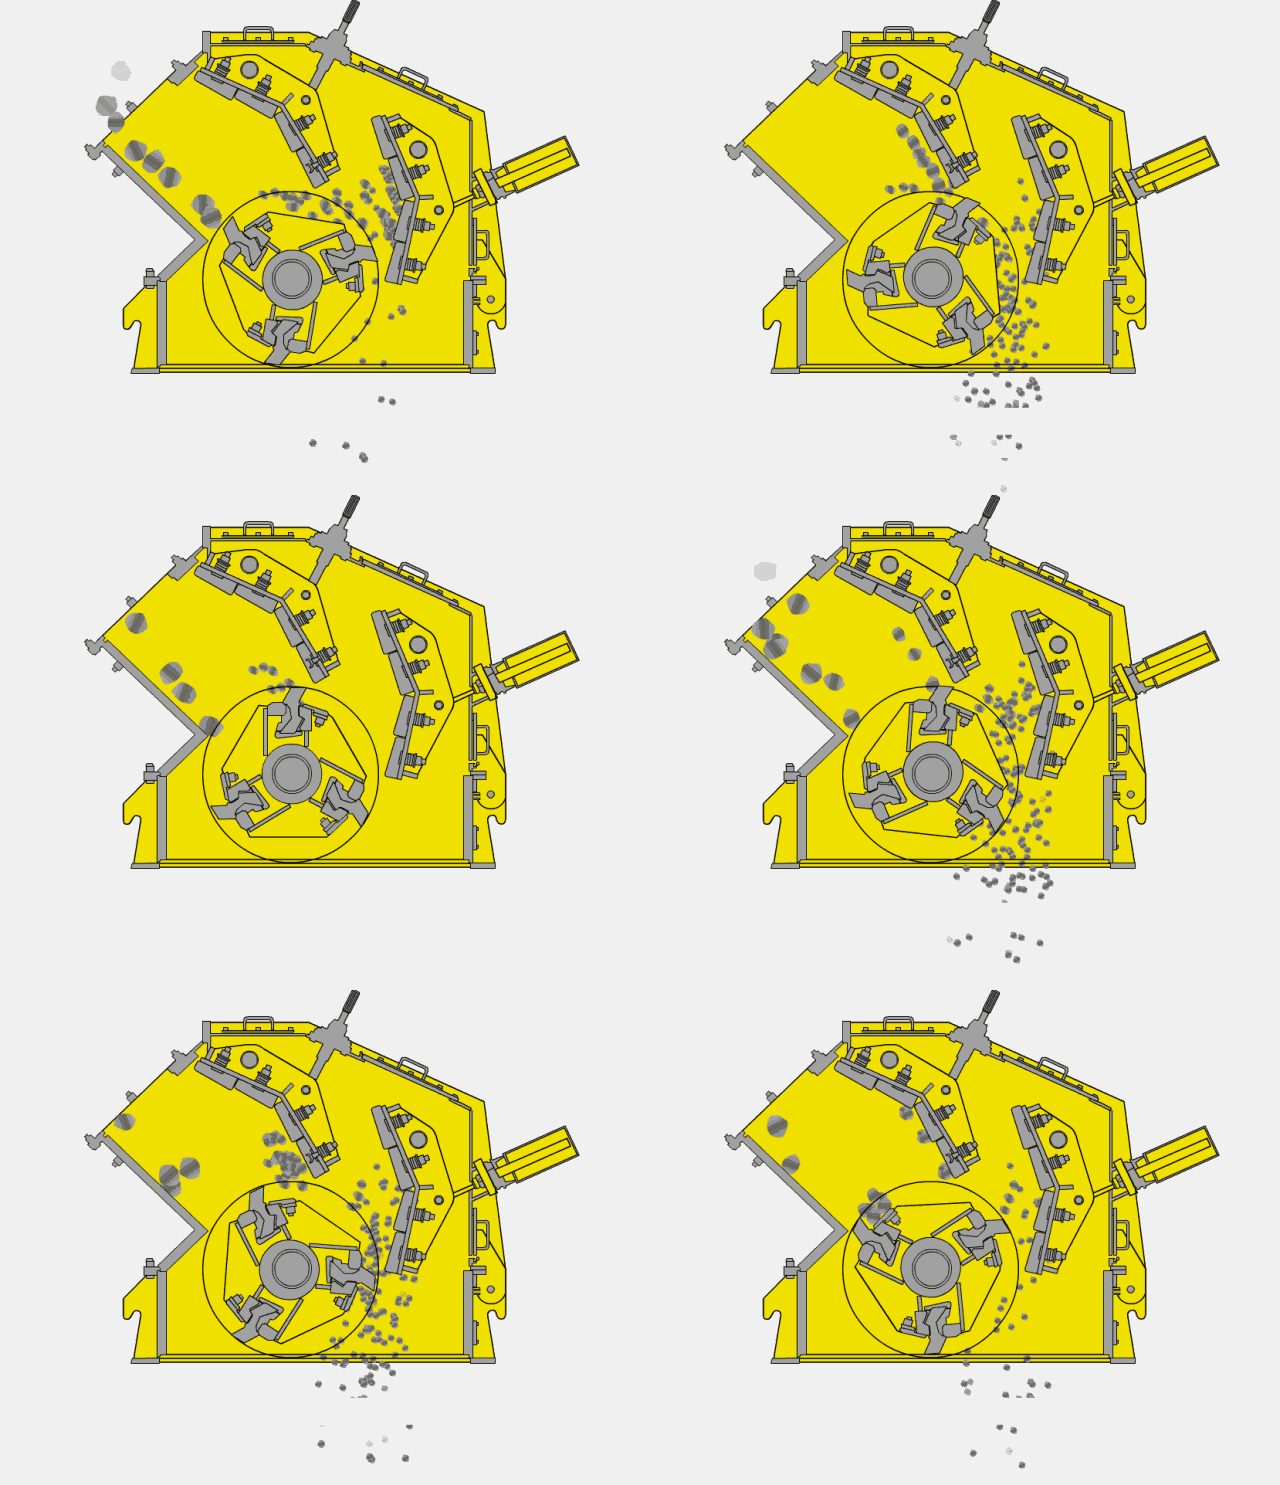
Impact Crushing Station (Machine)
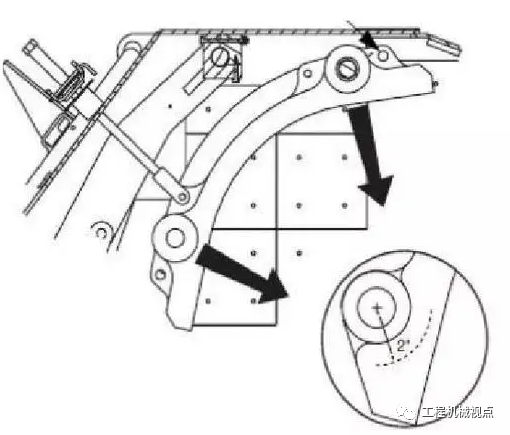
use a special flip cover device to open the rear upper frame to facilitate the rear work. Turn the rotor by hand, turn the plate hammer that needs to be replaced to the access door position, and then fix the rotor.
A- plate hammer removal:Check whether the plate hammer installation locking device, including rotor main board, supporting board, plate hammer, hexagon socket head screw, nut, wedge block, positioning block, etc. is complete and undamaged. At the same time, check whether the supporting board and rotor main board are welded together. Remove the plate hammer positioning parts, and then remove the pressing in the axial direction, and then push the plate hammer out of the access door in the axial direction, or lift out of the frame. In order to facilitate the disassembly of the board hammer, you can gently tap the board hammer with a hand hammer;
B- plate hammer:put the plate hammer in the supporting plate groove, the wedge is installed between the plate hammer and the rotor main board, the hexagon socket head screw is installed in the threaded hole of the wedge, the top is at the bottom of the main board groove, and the wedge is tightened. The nut is locked on the hexagon socket head screw at the bottom of the wedge, and the positioning block is welded on both sides of the rotor main board and clamped the wedge. The wedge block is locked, the hexagon socket head cylindrical head screw is pulled up and the nut is used to prevent loosening, and the positioning block is welded to prevent the wedge block from moving. When the rotor is running at high speed, under the action of centrifugal force, the wedge block is wedged The tighter the hammer is, the tighter the plate hammer is, so that the plate hammer is convenient and quick to install, and it is safe and reliable during use.
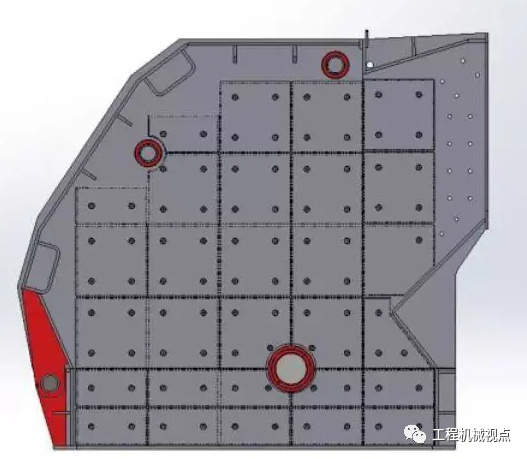
replacement of the side lining panel
Regularly check the side lining of the counterattack crushing station (machine). When the side lining of the counterattack crushing station (machine) is worn to about 15mm, it should be replaced. When the side lining of the counterattack crushing station (machine) breaks, regardless of whether it is worn or not, it must be replaced immediately.
Replacement of Side Liner
A. Open the upper cover of the counterattack crushing station (machine);
B to determine the liner to be replaced;
C Remove the bolts of the fixed lining plate. When the bolts are consolidated and cannot be removed normally, the bolts can be removed by cutting;
D Remove the lining board that needs to be replaced, clean the sand and gravel remaining at the installation part of the lining board, and clean the installation surface;
E Install a new liner, bolt lock wrench torque is 270N.m. When replacing the liner, replace the fixing bolts at the same time;
F to restore the crusher to its working state, start running for 5 minutes without load, and check for abnormal sound and vibration.
Replacement of Counterstrike Liner
Regularly check the counterattack lining of the counterattack crushing station (machine). When the counterattack lining is worn to the nut part close to the countersunk bolt, it should be replaced or the position should be changed. When the counter liner breaks, whether worn or not, it must be replaced immediately.
Replacement of Counterstrike Liner
A. Open the upper cover of the counterattack crushing station (machine);
B. Determine the counterstrike liner that needs to be replaced;
C to replace the position of the counter lining board, can be completed through the access hole on the cover of the counter-attack crushing station (machine), can be directly replaced;
D the position of the counterstrike liner to be replaced cannot be completed through the manhole of the upper cover of the counterstrike crushing station (machine). Please use the lifting device to disassemble the counterstrike board frame first, and then replace the counterstrike liner;
E Remove the bolts of the fixed lining plate. When the bolts are consolidated and cannot be removed normally, the bolts can be removed by cutting;
F Remove the lining board that needs to be replaced, clean the sand and gravel remaining at the installation part of the lining board, and clean the installation surface;
G Install a new counter liner, bolt lock wrench torque is 270N.m. When replacing the liner, replace the fixing bolts at the same time;
H restore the crusher to the working state, start running for 5 minutes without load, and check for abnormal sound and vibration.
Note: If you remove the counter strike frame, you need to adjust the clearance of the counter strike panel after replacing the counter strike liner.
A mobile motor makes the transmission belt loose enough to be easily removed. Do not use tools to pry the belt at the pulley;
B Remove the old drive belt and check for abnormal wear. Excessive wear may mean that there is a problem with the maintenance of the transmission;
C Select the specified type of drive belt to replace;
D Clean the drive belt and pulley, wipe the rag with a little non-volatile liquid, do not soak in the detergent or use the detergent to brush the drive belt, do not wipe with sandpaper or scrape the drive belt with sharp objects, the drive belt must be kept dry before installation and use;
E check the pulley for cracks or wear. If the wear is excessive, the pulley must be replaced;
F check whether all pulleys are on the same plane;
G Check relevant transmission components: such as symmetry, durability and lubrication of bearings, etc;
H must replace all belts at once. If only one of multiple drive belts is replaced, the new drive belt may be damaged prematurely;
I Tighten the center distance of the transmission device and turn the driving wheel several times by hand to determine whether the tension of the transmission belt is appropriate;
J Tighten the assembly bolts of the motor according to the specified torque;
K starts the transmission, runs at full load and then stops, checks and adjusts the tension to the recommended value. The operation of the transmission belt under full load can make the belt and the wheel groove completely match;
L, the operation shall be closely monitored to check for abnormal vibration and noise. Check the temperature rise of the bearing and motor. The temperature is too high. It may be that the belt is too tight, the bearing is asymmetrical, or the lubrication is incorrect.
A. Prepare the screen that needs to be replaced;
B. Verify the size of the screen;
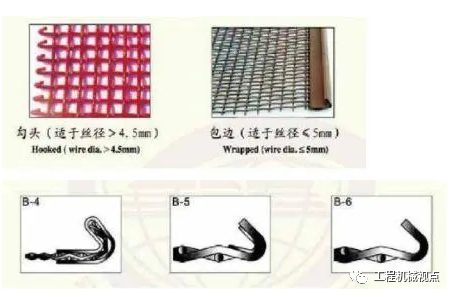
C to verify the groove head and edge form of the screen;
D. Make sure that all power of the machine is off;
E Use a wrench to remove the bolt connection between the pull plates on both sides of the screen to be replaced and the fixed screen surface;
F take out the screen that needs to be replaced and clean the foreign matter on the screen body;
G Check the condition of the special buffer sleeve rubber strip. If it is damaged, replace it;
H lay the new screen on the vibrating screen body, confirm the position of the screen, and ensure that there is an equal gap between the plates on both sides of the screen box and the hooks of the screen;
I In order to ensure the uniform surface tension of the screen, it is necessary to tighten the tension plates on both sides and tap gently along the full length with a hand hammer. Use the wrench to tighten the bolt connection between the pull plates on both sides of the screen and the fixed screen surface to check the tension;
J Check the installation and positioning of the screen. In order to properly tension the screen, the length of the screen hook bar must be consistent with the length of the tension plate. When the screen surface is assembled with segmented screen, the extension amount for overlapping at one end of the screen shall not be less than 20mm;
K. After the machine is replaced, restore the machine to its working position.
